Total Air War part 3: Windows 10 & Total Air War 2.0
- Dec 13, 2025
- 13 min read

The third and final guide in the Total Air War (TAW) series covers running TAW natively in Win10 with the Total Air War 2.0 mod.
This guide will take the TAW build created in a PCem Win95 virtual machine and move it onto Win10, before installing and and configuring the TAW 2.0 mod.
Due to the involved nature of the install all setup steps are shown, (duplicated from earlier articles where appropriate). except for patch and mod locations described in Total Air War part 1: Primer.
Strategy
The strategy employed in this guide is to take the install and patched build created in PCem and move it into Win10. Then the required compatibility utilities will be obtained and installed. Then the TAW 2.0 mod, will be obtained, installed and patched and finally a HOTAS will be configured and any remaining configuration performed.
Retail media
This guide assumes any physical cds will be ripped to a cd image file, to reduce wear and tear on media and drives. The retail version of TAW uses cd audio, so it is recommended to rip the cd to a bin/cue image pair, to preserve cd audio.
At present there is no release of the game on digital platforms.
Game management
As a windows game running under PCem emulation the VM and VM config sit under the PCem installation folder. However some limited game management is still useful for files used in the TAW setup.
The setup files for TAW and other Windows games can be found in the same folder (my own, as an example):
D:\Games\Win\<Game setup folder>
D:\Games\Win\TAW Setup
The following folders are used:
conf - to store any HOTAS profile configuration files.
docs - to store any useful documents, manuals, etc.
patch - to store a copy of recommended patches.
cd - to store any cd images.
PCem build
To copy the TAW install from the PCem Win95 virtual machine onto Win10. The steps to follow are:
Shutdown the virtual machine, if it is running, and close PCem.
Mount the virtual machine hard disk image (a .vhd file) by opening it. The hard disk will be mounted, assigned a drive letter and will be accessible with File Explorer.
The TAW folder needs to be copied from the hard disk image into Win10. If you installed TAW into the default TAW installation folder it can be found in (X: will be the drive letter assigned by Win10):
X:\Program Files\DIDCopy the TAW folder into a suitable location in Win10. As an example, my game management folder discussed earlier, would be:
D:\Games\WinThere should now be a D:\Games\Win\TAW folder present in Win10, as an example.
Unmount the hard disk image by ejecting the assigned drive. You may get a notification from Win10 about the device being safe to remove.
As TAW has already been patched on the virtual machine, this concludes the copying of the TAW installation folder.
Compatibility utilities
This section covers the required utilities required for maximum compatibility under Win10 (to date). It is recommended that copies of zip archives or installers are kept in the setup patch folder for safekeeping.
The compatibility utilities used are:
nGlide

Glide emulation is provided by the latest version of nGlide v2.10. Available from Zeus Software in nGlide download. nGlide is installed as a system level Glide wrapper as explained further in Glide Wrappers: Last Man Standing or Peace and Harmony?
Once installed the nGlide configurator is used to set the nGlide settings as shown in the screenshot.
VirtualMIDISynth and MIDIMapper (optional)

Installing and configuring these utilities is optional if you prefer to run TAW without MIDI music and just wish to use sound fx and speech.
VirtualMIDISynth is a MIDI synth that allows the soundfonts supplied with TAW to be used. MIDIMapper allows the VirtualMIDISynth device to be used as the default MIDI device, instead of the default Microsoft synth device (with does not support soundfonts).
If you have previously installed VirtualMIDISynth and MIDIMapper to play F22 ADF under PCem emulation or Win10, or TAW under PCem emulation, then you don't need to install them again, you're all set.
If you only installed VirtualMIDISynth then it's time to install MIDIMapper as TAW does not allow you to choose a preferred MIDI device (see below).
If you haven't installed either then...
The first step is to download and install VirtualMIDISynth, as described in the article, DOSBox Staging and VirtualMIDISynth. The DOSBox Staging config section can be ignored, as we aren't using DOSBox.
Then download and install MIDIMapper, which will integrate with VirtualMIDISynth, as described in the earlier article, VirtualMIDISynth and MIDIMapper.
Now we select VirtualMIDISynth as the default MIDI device with the MIDIMapper configurator:
Run the MIDIMapper Configurator.
Choose VirtualMIDISynth as your preferred default MIDI device.

Or with the VirtualMIDISynth configurator (that integrates with the MIDIMapper):
Run the VirtualMIDISynth Configurator.
Select the MIDI Mapper tab.
Choose VirtualMIDISynth as your preferred default MIDI device.

As shown above, both utilities allow you to do the same thing and set the default MIDI device. That concludes installing and configuring VirtualMIDISynth and MIDIMapper, adding the TAW soundfonts is next.
Soundfonts
Configuring soundfonts is optional if you prefer to run TAW without MIDI music and just wish to use sound fx and speech.
It is also optional if you added the soundfonts earlier when setting up the MIDI music for PCem. They have already been added to VirtualMIDISynth and are still available.
TAW has three soundfonts, (one for each of the AWE 32 memory configurations, so each soundfont is a different size), as described below:
File | Size |
tfx3512.sf2 | 443 KB |
tfx31meg.sf2 | 897 KB |
tfx3.sf2 | 1.4 MB |
These soundfonts can be found in the TAW installation Program folder, e.g.
D:\Games\Win\TAW\ProgramYou may add all three to VirtualMIDISynth, but only one should be active when playing. It's recommended the largest soundfont (tfx3.sf2) be used for highest quality music. To configure VirtualMIDISynth:
Run the VirtualMIDISynth Configurator app.
Add the F22 soundfonts to VirtualMIDISynth and select one of them (tfx3.sf2 recommended).
EarTrumpet
EarTrumpet is an app available on the Windows Store, which is effectively a drop-in, but enhanced replacement for the sndvol control panel. It offers a wide range of sound controls and more precise control over apps and the devices they play through.
And critically, it provides a customised action framework, to control sound through simple actions, including muting or unmuting apps with hotkey combinations.
For more details on the issue affecting TAW requiring the use of EarTrumpet, consult F22 Air Dominance Fighter part 4: Sounding better, as TAW suffers from a similar issue.
Installing
There are two releases a standard and experimental dev release. The experimental dev release is one required, as the action framework is not available in the standard release (at time of writing). Both are available at EarTrumpet.
Given that the app is distributed as a Windows installer package, installation is straightforward.
Once installed, go to Settings > Apps and configure EarTrumpet. My settings are shown below as an example. You may have to restart your machine once installed.
The interface is very clean and simple, (shown below). If you have the Actions option the correct release was installed.


Now all we need to do now is to create an action to unmute TAW!
Creating the action
Creating an action is a very simple process and it takes about 2 mins. The action I created has been exported and is available below. This can be imported into your copy of EarTrumpet.
This action is identical to the EarTrumpet action used by F22 ADF when running in Windows, so if this has already been done, then you're set.
It uses the hotkey combo of <ctrl> + F2 to unmute TAW. You should feel free to change this if you would prefer a different hotkey combo.
In fact it's so easy, that importing the above action might be more work than just recreating it, so I've included a screenshot of the action below:

OTVDM/WineVDM (optional)
OTVDM, also known as WineVDM, is a port of the Wine project that allows you to run old 16-bit Windows applications on modern 64-bit Windows operating systems. However, we won't be using it for this reason.
OTVDM also includes a winhlp32.exe utility, which allows opening old style Windows help files on 64-bit Windows, including the F22 ADF help file, which acts as a manual for some versions and is a useful reference.
The latest version of OTVDM/WineVDM is v0.9.0 available from the WineVDM GitHub, found in Releases. As it is distributed as a zip file, installation only requires extracting the files to a suitable folder of your choosing.
Setting up help
The TAW Windows help file is a very useful reference, however, legacy Windows help files are not accessible under Win10 without the use of the winhelp32.exe utility, provided by OTVDM.
It is recommended to create a shortcut of the winhelp32.exe and specify the TAW help file as part of the command line in the Target box:
X:\<OTVDM folder>\winhlp32.exe X:\<folder>\TAW\PROGRAM\TAWhelp.hlpFor example:
D:\utils\otvdm\winhlp32.exe D:\Games\Win\TAW\PROGRAM\TAWhelp.hlpUse double quotes (") around file paths with spaces in them.
The shortcut can be placed on the desktop or within the game management docs folders. Alternatively put the winhlp32.exe and TAWhelp.hlp files within the docs folder and create a shortcut with the appropriate file paths.
Total Air War 2.0 (TAW 2.0)
The Total Air War 2.0 (TAW 2.0) total conversion mod provides compatibility for later versions of Windows not initially supported by TAW. For more info on TAW 2.0, and how to obtain it, see Total Air War part 1: Primer.
TAW 2.0 was released prior to Win10, so there are a issues about the install to be aware of, covered below. It is a step by step guide so following the steps should result in a successful install of TAW 2.0
Installing TAW 2.0
The install is quite involved so it broken down into a number of sections. Scrrenshots are shown at the end of each section.
Preliminaries
This covers the basics of the install and starts copying files.
The first dialog is an intro about the install.
Then a destination folder is chosen.
Followed by a graphics card type, for the vast majority this should be a Direct 3d Capable Video Card.
Then a Start Menu folder is chosen, the default is fine.
File copying begins.


Microsoft Visual C++ 2008 Redistributable library
The next step adds Windows compatibility components, as the TAW installer has identified the Windows OS as Vista or later.
The installer requires Administrator privileges, so answer Yes to allow.
The TAW installer will start the Microsoft Visual C++ 2008 Redistributable library installer. If you don't have this library then follow the on-screen dialogs to install it.
However, it is very likely this library is already installed, so you won't be given the option to install, only to Repair or Uninstall. Select Repair to repair a perfectly good library which is unnecessary but allows the TAW installer to continue.
The next dialog, should tell you the library has been successfully installed or repaired.


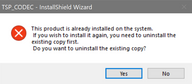
Truespeech codec
The next step is to install (or remove) the Truespeech codec.
The TAW installer will start the Truespeech codec installer.
If the Truespeech codec isn't present it will confirm the install request and confirm a successful installation, once complete.
If the Truespeech codec is present the Truespeech installer will warn the existing codec must be removed. It will then confirm the removal of the existing codec. Once removed a successful removal dialog will be shown.
Removal is not a problem as the codec can be reinstalled, once the TAW installer is complete. The important thing is to complete the TAW installation.


TAW Battle Commander (TAWBC)
The next step is to install and register the TAW Battle Commander (TAWBC). It's recommended to Register during the TAW 2.0 install.
A dialog appears suggesting the Microsoft Application Compatibility Toolkit (ACT) may be required to use TAWBC and where to find the toolkit. This would be done after the TAW 2.0 installer has completed.
The ACT has been replaced by the Microsoft Assessment and Deployment Kit (ADK). So you may wish to use this instead, there's a short guide on it usage, A retro gamers friend: Microsoft Compatibility administrator.
The ADK Compatibility administrator (32-bit) would be used to apply the TAW.sdb compatibility fixes (as TAWBC is a 32-bit app), after the TAW 2.0 installer has completed.
The next dialog covers registering TAWBC using the details in a text file (serno.txt) that will also be opened in Notepad, during the TAWBC installation.
To register, enter the details into the TAWBC dialog. The date format in the serno.txt text file matches the date format of the TAWBC dialog. Once entered, select Register.
A TAWBC Info dialog will appear confirming successful registration.


TAWBC first run
The next section covers the first run by TAWBC to complete the TAWBC setup.
A TAWBC First Time Setup dialog will appear, select OK to confirm the TAW 2.0 installation folder.
Another TAWBC Info dialog will appear, select OK to allow TAWBC setup to continue.
When the Battle Commander page (with a theater map) appears, select Exit to leave TAWBC and continue the TAW 2.0 installation.
A dialog with the folder location containing the serial no. text file and keygen is displayed.


Readme and launch
The TAW 2.0 readme file is opened in Notepad. Close to continue the install. This readme file (ReadMe_20.txt) can be found in the TAW 2.0 installation folder.
The last dialog gives the location of the TAW 2.0 Manual Addendum and allows the TAW 2.0 launcher app to open and start the first run setup.


TAW 2.0 first run setup
This section covers the initial setup of TAW through the TAW launcher. Note: All these options may be changed later by running the TAW launcher app.
The first dialog is about restoring TAW skins and the skin customisation about to be shown.
The Airframe Selection options are shown, this can be customised later as the default skins are fine for now.
Next a dialog is shown asking for the TAW executable file to be chosen.
Choosing the Direct3D Version (if you wish to run Direct3D rather than Glide), TrackIR variant, Helmet Mounted Display (HMD) and Multifunction Display (MFD) configs are left up to personal preference. The TAW 2.0 manual (included with TAW 2.0) should be consulted for further info on these options.
However the Glide option (if Glide is preferred) should be set to 3DFX Hardware or No Glide Wrapper Selected. This may seem like an odd choice, so further explanation is required:
The latest version of nGlide v2.10 is installed as a system Glide wrapper. It will handle Glide requests if there are no other Glide wrappers in the TAW 2.0 installation folder. It is the default fallback Glide wrapper.
If nGlide is chosen from the TAW executable menu, then an earlier version of nGlide will be added to the installation folder causing the earlier nGlide version to be used.
If dgVoodoo (not dgVoodoo2) is selected, from the TAW executable menu, then dgVoodoo will be added to the installation folder causing dgVoodoo to be used as the Glide wrapper.
As nGlide v2.10 works well with TAW 2.0, selecting 3DFX Hardware or No Glide Wrapper Selected ensures no other Glide wrappers are added and nGlide v2.10 will be used.
For further info see Glide Wrappers: Last Man Standing or Peace and Harmony?
Don't forget to Save the settings, once finished.
The next dialog confirms the TAW executable choices.


TAW 2.0 finishing up
All that remains are a few changes to complete the setup. If TAW or the TAW 2.0 launcher is running they should be closed before making these changes.
Truespeech codec
If the Truespeech codec was removed during the TAW 2.0 install then the Truespeech installer should be run to replace the missing codec. The codec installer app is located below:
X:\<TAW 2.0 folder>\!ADP\utilities\TrueSpeech_Codecs\tsp_codec_install.exeTAW 2.0 Launcher compatibility settings
The Run this program as an administrator checkbox should be checked under the Compatibility tab of the TAW 2.0 launcher (tawmenu.exe) Properties. The launcher is located in the TAW 2.0 folder.
This allows the Enable Nostalgia option, found under Customization, Music and Mods menu, in the TAW 2.0 launcher, to work correctly.
TAWBC compatibility fixes
Note: At present no issues have been noted with TAWBC under Win10. If you have issues, you may wish to either:
Install the Application Compatibility Toolkit (ACT) and install the TAW.sdb compatibility fixes for earlier versions of Windows (7/8). The toolkit and fixes can be found in:
X:\<TAW 2.0 folder>\!ADP\utilities\Application Compatibility Toolkit 5.5For Win10, download and install the Microsoft Assessment and Deployment Kit (ADK) and install the TAW.sdb compatibility fixes. Using the later ADK rather than the ACT is recommended.
Configuration
Configuration options should now be set. When running under Win10 all graphical options can be selected or maximised, as shown below.

Further configuration (optional)

There are a number of hidden settings which aren't available from the in game options screen, but have to be entered manually by opening the game.cfg file in a text editor.
These options are detailed in the Game cfg Guide, found in the Additional ADF/TAW References in the References section of the F-22 Total Air War 2.0 Launcher, as shown in the screenshot.
The game.cfg file can be found in the TAW 2.0 folder.
HOTAS Config
Joystick, throttle and rudder pedals are supported. Configuring axes may not be required if your HOTAS has 4 axes or less. When using devices totaling more than 4 axes, a virtual controller can be used, limited to 4 axes.

As TAW automatically detects the HOTAS controller. if your controllers exceed 4 axes or 32 buttons (or both) you may see the following error when trying to run TAW (see screenshot).
For those using controllers from multiple vendors, the vJoy/Joystick Gremlin combination may be required instead of vendor specific HOTAS profile software. You may also have to use HidHide as a device firewall, to hide your real controllers, so only the vJoy virtual controllers are detected by TAW.
The physical axes to Windows axes were configured as follows:
Physical axis | Windows axis |
Joystick x-axis | DX_X_AXIS |
Joystick y-axis | DX_Y_AXIS |
Throttle | DX_Z_AXIS |
Rudder | DX_ZROT_AXIS |
Note: The rudder axis changes from DX_XROT_AXIS (in the previous article for TAW in PCem) to DX_ZROT_AXIS (for Win10), for my controllers. You may/may not have to make a similar change depending on your HOTAS hardware.
If you have already created a config for F22 ADF under Win10, you may wish to reuse this config for TAW.
Head Tracking
The TrackIR option can be enabled with the 32 Bit (Includes TrackIR) option under the Graphics and Applications Configuration menu, in the TAW 2.0 launcher.
The F22 TrackIR Patch v1.1 is not required as TrackIR support is integrated into TAW 2.0.
This option is compatible with OpenTrack & AITrack. For more info, see Head tracking with Opentrack & AITrack.
Patching TAW 2.0 (optional)
These patches add additional music with the TFX soundtrack in both MT32 and Sound Blaster 16 versions.
If TAW or the TAW 2.0 launcher is running they should be closed before making these changes. To install, simply run the executable installer app. It will automatically find the TAW 2.0 folder and add the music.
Once installed, it can be selected by from the dropdown menu in Choose Playlists to run in TAW 2.0. This is found in Customization, Mods and Music in the TAW 2.0 launcher.
These patches are optional and left to personal preference.
Issues
Only a single issue remains when running TAW with the TAW 2.0 mod, under Win10.
MIDI music on startup
Issue: If MIDI is enabled, selecting a pilot and continuing onto the menu page straight away may cause a crash to desktop.
Workaround: Wait for approximately 20-30s before selecting a pilot and continuing.
Example video
Finally
Huge credit and thanks goes to the TAW 2.0 team of modders and contributors including but not limited to (listed alphabetically):
Alfredo Costalago (a.k.a. Krusade)
DrKevDog
Benjamin Haisch (a.k.a. john_doe)
Don Heumphreus (a.k.a. Home Fries)
MGonzales
mikew
polak (a.k.a. Xela)
Spear (a.k.a. jolly07)
As well as:
Zeus for nGlide.
The CoolSoft devs for VirtualMIDISynth and MIDIMapper.
The EarTrumpet devs.
otya128 for the work on OTVDM.
@Damsonn for the HOTAS max buttons hint.
TAW 2.0 team members courtesy of Krishty and The Story of Total Air War. If I've missed anyone (and I probably have) let me know, so they can be acknowledged.
Good Hunting!